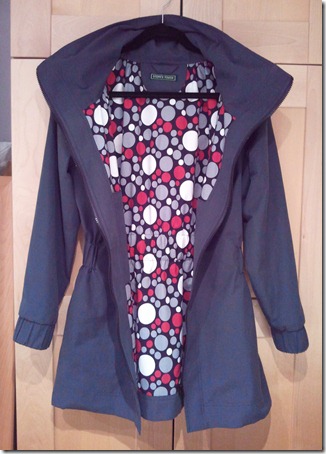
Yes, indeed, I have finally finished the Minoru jacket! And despite all the kafuffle I quite like it, and so does my hubby!
What kind of kafuffle, you ask? Well, I made a second muslin because the first was too snug, then made more slashes for greater back ease and a forward neck tilt. But after I got the entire shell sewn together (attached the collar, sleeves, plackets, to the body, and side seams) I tried it on…and there was *too much* room!!! Aaaargh! So, out with the seam ripper, whereby I ripped out the entire collar topstitching/seam up to the plackets and removed the extra fabric I’d added to the top of the back and sleeve tops. This is also when I decided to line the hood. In hindsight, I think the cause of all my problems was the cheap poly/cotton I used for making the muslin; it just didn’t have the weight/body needed for the jacket. At least I now know where to get the real muslin fabric!
Here’s a quick summary of what I did.
Fabric:
- Outer shell in Canadian Mist (50% Micropolyester / 50% Cotton, bought at dragonfly fabrics), grey – perhaps a bit dull, but it’s a neutral colour
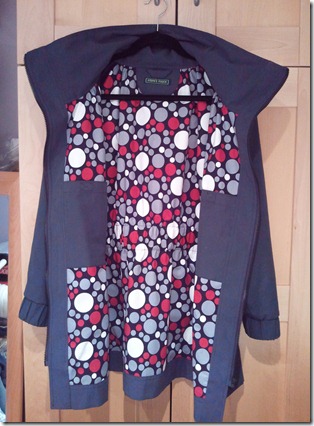
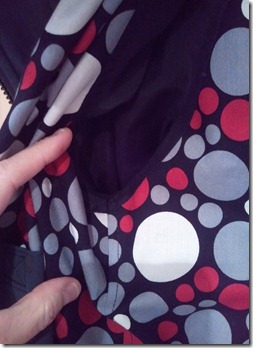
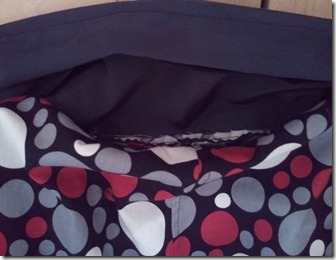
- Body/Hood lining in quilting cotton – I LOVE this fabric, makes up for the grey shell
- Sleeve lining in black rayon Bemberg
- Collar lined with black Bemberg (on the zipper side)
- Outer side seam pockets in the quilting cotton and black Bemberg
Alterations:
- Cut size 10-10-8 (B-W-H), according to the pattern measurements
- Shortened the sleeves by 3 1/2 in
- Widened the sleeve by 1/2 in along the entire length
- Dropped the front neckline by 1/2 in for a forward neck tilt, and adjusted the front seam on the sleeves to match
- Widened the upper back by 1/2 in, from the armscyes up to the neck
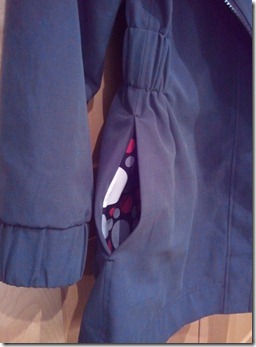
- Added side seam pockets, and topstitched on the front piece instead of the back. The bottom of the pockets is caught in the hem.
- Lined the hood (yeah, I did this after it was all assembled! when I removed the collar)
- Made deeper inside pockets to fit my smartphone (and raised the top of the pocket so it wouldn’t fall so low down the waist). Instead of folding over the top of the pocket twice and topstitching, I used grosgrain ribbon
- Topstitched the lining as I didn’t finish the seams
Future alterations, and what I would do differently or try:
- Cut the hips a size larger
- Use a double-ended zipper
- Cut the cuffs a little longer so they look more scrunched
- Make front welt pockets; the side seam pockets are a tiny bit low and far back for comfort
- Make the welt pocket bag the same shape as the bottom of the front section so it can be caught in the side and placket seams
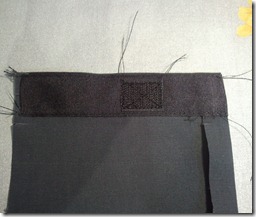
- Finish the hood/collar seam, maybe bind it, as it’s visible when the hood is out and down (see pic below)
- Make an hidden inner pocket, with the opening in the placket/front seam
- Make a wider inner pocket so the smartphone can sit sideways; it’s a little uncomfortable sitting upright
- Add an inner placket/strip or zip guard; I noticed some others did this and it looks great
What I really like about the pattern and alterations:
- The snug waist elastic! Someone else said it felt like being hugged, and they’re right!!
- The big hood, and that it’s lined; if the outer fabric doesn’t have much body this really helps keep it up
- Hip length!
- Big, tall collar, it’s just so cozy!
- Wider sleeves for more ease
- Deeper inside pockets feel safer
I’m so glad it’s finished, and with the weather warming up so fast (it’s crazy, forecast says 21 C tomorrow!!!), I’ll be wearing this a lot earlier than I’d thought. I LOVE it!!
Next up, I need to make some sweatpants for Oliver since he’s outgrown the others. And then the new Jalie shirt pattern and T-shirt (w/o the nursing option) that I really want to try. If the weather keeps up like this I’ll need to work fast! At least these will go a lot faster than the jacket.
Your hard work paid off. It sounds like a lot of trouble, but the end result is very nice indeed! I particularly like your lining choice; it adds a bit of fun and zip.
ReplyDeleteThanks Karin! I'm so glad it's finished now. There wasn't a lot of choice for the outer fabric, so I knew I'd want a bright fun lining, and this just made it for me!
DeleteI love it! The lining fabric is so fun. The idea to make the side pockets same size/shape to be caught in the hem and placket seams is a really good idea! I might try that out on my next version!
ReplyDeleteGreat job! Looks fabulous.
ReplyDeleteFantastic! I like that you paired a neutral colour exterior with a zippy bold lining.
ReplyDeleteChristiana
sewamusing.blogspot.com
Thanks Christiana, and Susan and Christina!
DeleteI tried a lot of designs and colourways before settling on the one I used, it was interesting how it evolved and my initial thoughts were a little different.
I just realized that I've done the same thing with my Burda jacket that's still a UFO:
http://escapadesinsewing.blogspot.ca/2012/01/burda-jacket-02-2011-109-ufo.html
The lining in this jacket is quite bright as well! Hopefully I'll be able to tackle it before the weather gets too warm for it!
Oh, I am in love with this one. Just so pretty!
ReplyDeleteThanks for the comments on my shirt dress...it was so much fun putting that one together. I LOVE this jacket! Wow...that was a project I don't think I would have attempted...great job! Great blog!
ReplyDeleteDorcas (Art Attack)
Nice job. You'll enjoy it in spite of the trouble it caused you. And I like the lining fabric, too!!
ReplyDeleteSueC56
Oh wow, it's fantastic! I happen to really love grey-- not dull at all. And the lining fabric is so fun.
ReplyDelete